How to Create a New Project
Create a project in the DNotifier dashboard and locate the App ID and App Secret it generates for your SDK.
Open the Projects Page
From the DNotifier dashboard, click "Projects" in the left sidebar. If you haven't created a project yet, you'll see an empty state with a "Create New" button — both in the top-right corner and in the middle of the page.
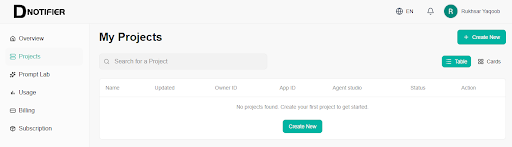
Click "Create New"
Click either "+ Create New" button shown above. A form will appear asking for basic details about your project (name, and any optional metadata such as description or environment). Fill these in and submit.
- Use a name that identifies the project clearly, e.g. a name matching the app you're building.
- If you plan to separate development and production, consider a naming convention like "myapp-dev" and "myapp-prod".
Locate Your App ID
Once the project is created, open it to find its App ID. This is a public identifier for your project and is used alongside your App Secret when initializing the SDK.
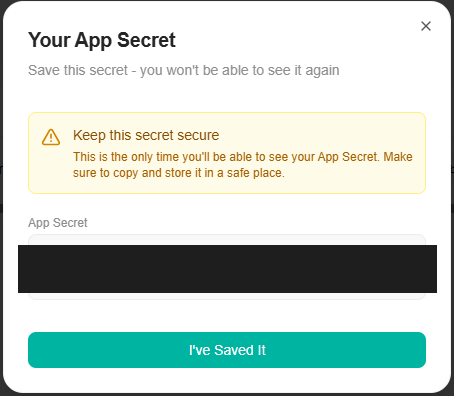
Save Your App Secret Immediately
When the project is created, DNotifier will show you the App Secret exactly once. Copy it right away and store it somewhere safe — a password manager or your environment configuration — because it will not be shown again after you dismiss this dialog.
Store Both Values as Environment Variables
Once you have both values, add them to your project's environment configuration rather than hardcoding them:
Your project is now created and ready to use with the DNotifier SDK.
DNOTIFIER_APP_ID=your_app_id
DNOTIFIER_APP_SECRET=your_app_secret
Watch: Create a new project
Same steps as above — use whichever format you prefer.
DNotifier Tutorial
Tutorial 1 of 5
- Tutorial 1How to Create a New Project
- Tutorial 2How to Install the DNotifier SDK
- Tutorial 3How to Choose a Transport
- Tutorial 4How to Make Your First Connection
- Tutorial 5How to Send and Receive Your First Message